2012 Mustang 25.1 chassis build
+14
QtrWarrior
jbozzelle
TTrotter
dfree383
TravisRice
DILLIGASDAVE
psfracer
stanger68
BBFTorino
Mark Miller
Mike R
samiam
lance flake
460bronco
18 posters
Page 2 of 3
Page 2 of 3 •  1, 2, 3
 Re: 2012 Mustang 25.1 chassis build
Damn Nice.
I see Chassis Engineering has changed how they do some of the bars vs a few years ago.
I see Chassis Engineering has changed how they do some of the bars vs a few years ago.

DILLIGASDAVE- Posts : 2262
Join date : 2009-08-08
Location : Texas. pronounced "texASS"
 Re: 2012 Mustang 25.1 chassis build
x2......very nice build. Always a satisfying feeling doing something yourself and it turning out professional looking. I'll keep lurking here as well to see it come together
TravisRice- BBF CONTRIBUTOR

- Posts : 1192
Join date : 2009-02-07
 Re: 2012 Mustang 25.1 chassis build
stanger68 wrote:If you don’t mind me asking. How much is a boxed up kit like that? Did it come with the front end and steering components? I e been kicking around the idea of updating mine next year. Versus the cost of just buying a roller and selling mine.
Stanger68- Here is a link to the kit that I bought. The kit is the tubes for the chassis only. However, they do have nice packages for each stage of the build.
https://chassisengineering.com/index.php?route=product/category&path=10_483
I went ahead and got the upgrade to morph the chassis into a double framerail version. My only complaint was the double frame rail addition didn't come with any instructions!!

460bronco- Posts : 364
Join date : 2010-04-07
Age : 38
Location : Meridian, Ms
 Re: 2012 Mustang 25.1 chassis build
DILLIGASDAVE wrote:Damn Nice.
I see Chassis Engineering has changed how they do some of the bars vs a few years ago.
Thanks Dave! I'm sure I'll be picking your brain some along the way!

460bronco- Posts : 364
Join date : 2010-04-07
Age : 38
Location : Meridian, Ms
 Re: 2012 Mustang 25.1 chassis build
Thanks. After I wrote that it dawned on me that was the same kit I had bookmarked a while back. LOL.460bronco wrote:stanger68 wrote:If you don’t mind me asking. How much is a boxed up kit like that? Did it come with the front end and steering components? I e been kicking around the idea of updating mine next year. Versus the cost of just buying a roller and selling mine.
Stanger68- Here is a link to the kit that I bought. The kit is the tubes for the chassis only. However, they do have nice packages for each stage of the build.
https://chassisengineering.com/index.php?route=product/category&path=10_483
I went ahead and got the upgrade to morph the chassis into a double framerail version. My only complaint was the double frame rail addition didn't come with any instructions!!
stanger68- Posts : 492
Join date : 2015-12-05
Location : Birmingham, Al
 Re: 2012 Mustang 25.1 chassis build
Nice looking car!

dfree383- BBF CONTRIBUTOR

- Posts : 14821
Join date : 2009-07-09
Location : Home Wif Da Wife.....
 Re: 2012 Mustang 25.1 chassis build
Awesome build! Something I wish I could take on myself currently. Any updates?
TTrotter- Posts : 16
Join date : 2018-03-07
 Re: 2012 Mustang 25.1 chassis build
Looking good. I'll be following this one. I like that body style...
jbozzelle- Posts : 3705
Join date : 2009-08-10
Age : 50
Location : New Orleans
 Re: 2012 Mustang 25.1 chassis build
It was good to meet you and your family at the race last weekend. Post some progress pics so we can keep you motivated to finish it.
jbozzelle- Posts : 3705
Join date : 2009-08-10
Age : 50
Location : New Orleans
 Re: 2012 Mustang 25.1 chassis build
jbozzelle wrote:It was good to meet you and your family at the race last weekend. Post some progress pics so we can keep you motivated to finish it.
X2

QtrWarrior- Posts : 2699
Join date : 2008-12-02
Age : 65
Location : Bloomingdale, Ga
 Re: 2012 Mustang 25.1 chassis build
Hey Guys- It was great finally putting some faces to the screen names on here at the Ford Bash Race!!!! I felt like I already knew all of you!!!
As for the car, it has been a slow process. For the next few steps of the car, I've had to order some parts to properly set things up, and when it comes to ordering parts, there are a million decisions to be made!
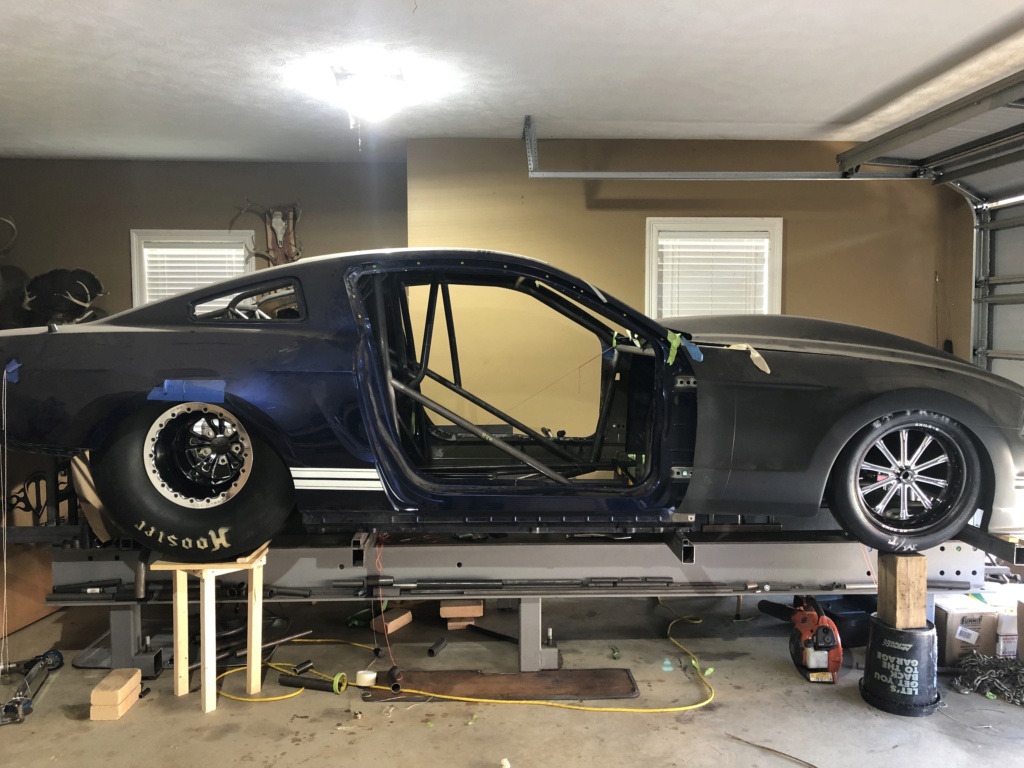
With that being said, I started w/ wheels and tires...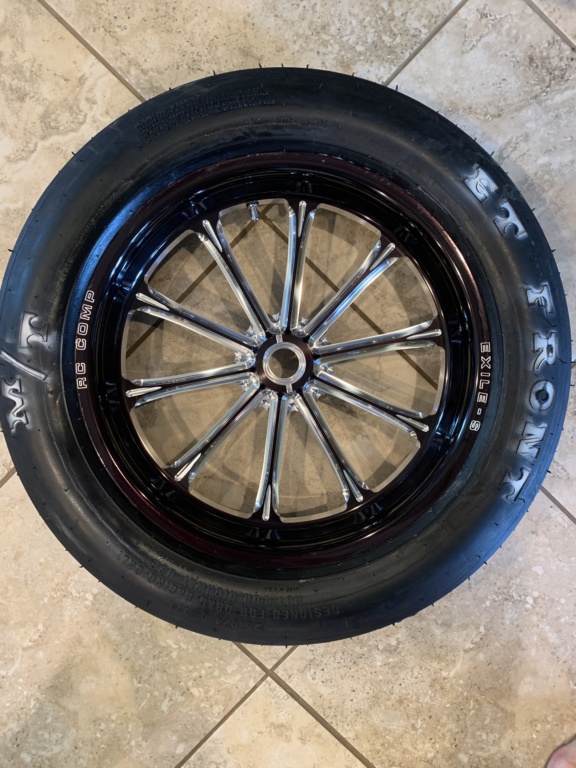

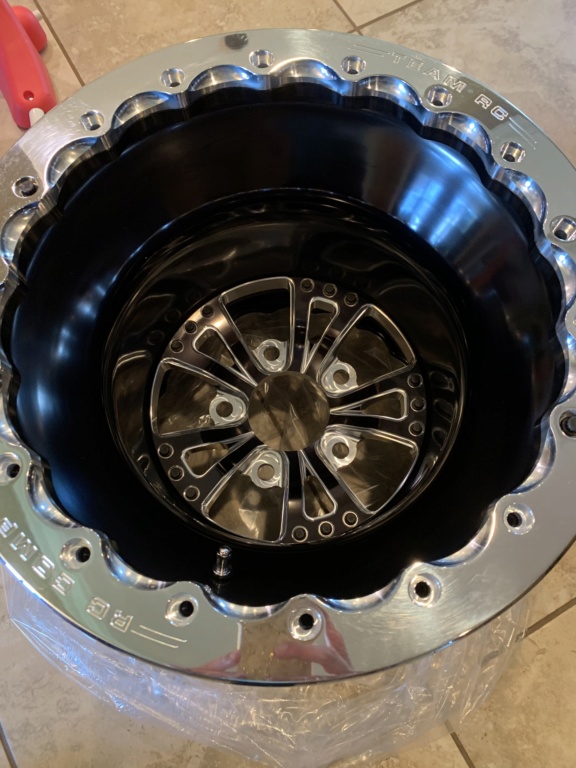
As for the car, it has been a slow process. For the next few steps of the car, I've had to order some parts to properly set things up, and when it comes to ordering parts, there are a million decisions to be made!
With that being said, I started w/ wheels and tires...


460bronco- Posts : 364
Join date : 2010-04-07
Age : 38
Location : Meridian, Ms

460bronco- Posts : 364
Join date : 2010-04-07
Age : 38
Location : Meridian, Ms
 Re: 2012 Mustang 25.1 chassis build
Ok- so, I'm a little excited about the wheels and tires!!! But I need to back up a little and go over the A-Pillar bar situation and funny car cage install.
The bars Chassis Engineering sent for the A-pillar didn't fit any where near like I wanted-- No biggee I just got some more tubing and bent up what I thought I wanted. In the pic below, I thought I wanted the top portion of the door bar to be parallel to the ground. In theory it sounded good, but after installing the moulding around the door opening, the bar was still very visible. Also, the few times I slipped into the car, I bumped my noggin right on it.
**One other cool thing about this bar is it has 2 bends in different planes. The bar needed another small kick down toward the dash bar to fit as closely to the A-pillar as I wanted. It was tough figuring out the degree of the 2 bends and then how many degrees the second bend was in a different plane from the first bend.
So, here is round one on the door bar-- probably would have been fine, but I still wasn't satisfied.

You can see the top of the door bar hanging down in the picture below. Sorry for the poor lighting.

So, here goes round 2 for the door/ a-pillar bar.

Below is a view from the front showing the relationship between the window bars and the windshield frame.

Decisions, decisions. The 2nd design doesn't look as good to me, but is more functional, so I went with it! Next, is funny car cage---
The bars Chassis Engineering sent for the A-pillar didn't fit any where near like I wanted-- No biggee I just got some more tubing and bent up what I thought I wanted. In the pic below, I thought I wanted the top portion of the door bar to be parallel to the ground. In theory it sounded good, but after installing the moulding around the door opening, the bar was still very visible. Also, the few times I slipped into the car, I bumped my noggin right on it.
**One other cool thing about this bar is it has 2 bends in different planes. The bar needed another small kick down toward the dash bar to fit as closely to the A-pillar as I wanted. It was tough figuring out the degree of the 2 bends and then how many degrees the second bend was in a different plane from the first bend.
So, here is round one on the door bar-- probably would have been fine, but I still wasn't satisfied.

You can see the top of the door bar hanging down in the picture below. Sorry for the poor lighting.

So, here goes round 2 for the door/ a-pillar bar.

Below is a view from the front showing the relationship between the window bars and the windshield frame.

Decisions, decisions. The 2nd design doesn't look as good to me, but is more functional, so I went with it! Next, is funny car cage---

460bronco- Posts : 364
Join date : 2010-04-07
Age : 38
Location : Meridian, Ms
 Re: 2012 Mustang 25.1 chassis build
Once again, the funny car cage bar didn't fit anything like what I wanted. When I got the top of the funny car cage bar where I wanted it (level with the ground and equal in height or higher than the main hoop/ front windshield bar), the bottom portion of the funny car cage bar was no where near close to hitting my upper 4-link cross member.
No biggee- I'll just bend another- Here are a few pics of the mock-up and fitment of outer FCC bar.


Here are a few more FCC bars in-


No biggee- I'll just bend another- Here are a few pics of the mock-up and fitment of outer FCC bar.


Here are a few more FCC bars in-


460bronco- Posts : 364
Join date : 2010-04-07
Age : 38
Location : Meridian, Ms
 Re: 2012 Mustang 25.1 chassis build
The next decision had to do with the design of the floor- Would the floor be on top of the tubing or be under and a belly pan? The driver floor board has to be atleast 0.024" steel and the firewall has to be the same steel or titanium and I can't remember the spec on aluminum right now.... So, I called all of my metal sources and nobody had 0.024" steel 
I called chassis shops all through Alabama, Mississippi, and Louisiana. Everybody acted like I had two heads when I said I wanted to run the 0.024" steel. I was even told it was illegal! Anyway, it came straight from the NHRA rule book---. One call to Tim McAmis and yep they have it on the shelf. Can you see a trend? Those guys know their stuff!
Back to floor design- Steel will go on driver side on top of the tubes and the rest of the floor will be Carbon Fiber and flush mounted to the bottom of the floor tubes. The main frame rails are 1.5" chromoly and the remaining floor structure is an assortment of 1" and 3/4" tubing. That being said, these smaller tubes have to be offset notched to either the top or the bottom of the large frame rails for proper support of the flooring.
Here are a few pics-


Last edited by 460bronco on July 7th 2019, 1:40 pm; edited 1 time in total

460bronco- Posts : 364
Join date : 2010-04-07
Age : 38
Location : Meridian, Ms

460bronco- Posts : 364
Join date : 2010-04-07
Age : 38
Location : Meridian, Ms

460bronco- Posts : 364
Join date : 2010-04-07
Age : 38
Location : Meridian, Ms
 Re: 2012 Mustang 25.1 chassis build
Sweet! I love it!
stanger68- Posts : 492
Join date : 2015-12-05
Location : Birmingham, Al
 Re: 2012 Mustang 25.1 chassis build
The roof bars can be bent upward slightly in one or two places to get them up out of the doorway. You can either put the bend in the center of the roof bars span, or closer to the main hoop (about/around where the front outer F/C cage bar attaches to the roof bar).


Also IIRC yellowbullet had a post or two where some guys were even using tubing rollers to give the roof bars a nice gradual curve that followed the curved roof line real tight. But the tubing roller worked much better on mild steel tubing, and was harder to accomplish on 'moly tubing.
One thing I would change on the main diagonal door bars is moving the front/lower attachment point up off the floor about an inch to 1.5" so the door bar only attaches to the lower windshield upright bar, and not the rocker bar (or the foot bars/outriggers). That "hot-corner" of tubing (rocker bar to windshield bar to foot bar assembly) is already going to have a fairly large weld heat effected zone. Adding the the door bar down into that same corner/joint will greatly increase the size of the already big weld/heat effected zone. Plus getting the door bar weld joint off the floor will make it a lot easier to make the floor panels.
As for the floor panels being above or below the tubing it's a coin flip. Above the floor and they get beat up & dented more from being stepped on a bunch. Under the floor and more dirt off your shoes will collect in the car. If you go the under/bellypan route you loose a bunch of places on the frame to place jackstands under the car. But one advantage of the bellypan on the passenger side is that a removable passenger side pan can usually be made out of less panel sections (or sometimes even a one piece panel) vs a removable above floor pan.

DILLIGASDAVE- Posts : 2262
Join date : 2009-08-08
Location : Texas. pronounced "texASS"
 Re: 2012 Mustang 25.1 chassis build
Usually (usually) the minimum for floor/firewall is .024" for steel & .032" for aluminum (but IIRC there are a few exceptions to this depending on the situation).
Your average metal supplier out there is more used to hearing thickness requests referencing gauge numbers vs thousands of an inch. And the "official" gauge-to-thousands of an inch cross reference charts are mostly useless because a lot of generic sheetmetal the metal suppliers offer is almost always a little thinner than what it's advertised "gauge" says it should be in thousands of an inch.
The best bet if you're buying sheetmetal locally is don't trust what the salesman says the thickness is of a given gauge of sheetmetal. Ask him to take you out into the warehouse and actually measure a few different gauges of what they have on hand that day. Depending on how fuukd up a production run was you might find you're having to buy 24,23,or even 22 gauge sheetmetal to just make sure you have at least .024" thick material to work with.

DILLIGASDAVE- Posts : 2262
Join date : 2009-08-08
Location : Texas. pronounced "texASS"
 Re: 2012 Mustang 25.1 chassis build
Weld it! It looks fine to me. The older I get the less I care about cosmetics. Every hour you burn worrying about moving that bar up another half inch could be another hour at the track. Sometimes you have to remind yourself your going racing and not to a car show. Not body else is going to notice unless you tell them.
stanger68- Posts : 492
Join date : 2015-12-05
Location : Birmingham, Al
 Re: 2012 Mustang 25.1 chassis build
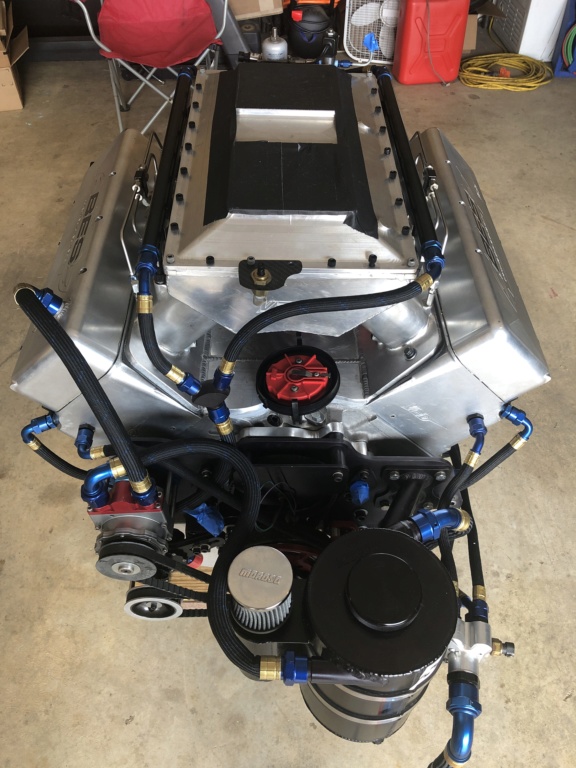
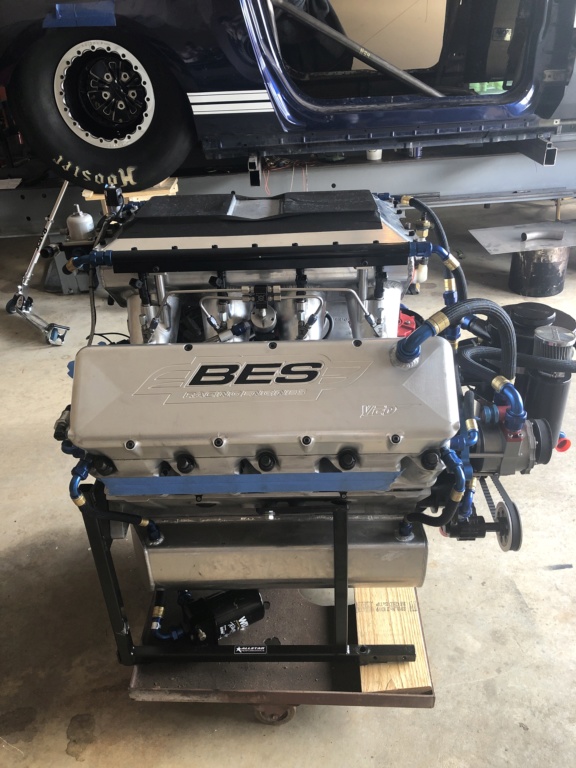
Thanks guys for all the input! After getting the engine, I have had a new source of motivation!!! As soon as my struts come in from Menscer, I’ll get the front of the chassis finished. I can see light at the end of the tunnel!!!

460bronco- Posts : 364
Join date : 2010-04-07
Age : 38
Location : Meridian, Ms
 Re: 2012 Mustang 25.1 chassis build
what are you trying to run? some 6sec passes!  nice car and keep pushing!

nitrous.f- Posts : 294
Join date : 2011-06-05
 Re: 2012 Mustang 25.1 chassis build
Hoping to run some mid to low 4’s in the 1/8th!!!

460bronco- Posts : 364
Join date : 2010-04-07
Age : 38
Location : Meridian, Ms
Page 2 of 3 •  1, 2, 3
 Similar topics
» Mustang II tube chassis build
» My new 528 combo
» Need a Chassis for my new build. GOT ONE!!!
» chassis build or buy
» C460 headers, possibly a460 too
» My new 528 combo
» Need a Chassis for my new build. GOT ONE!!!
» chassis build or buy
» C460 headers, possibly a460 too
Page 2 of 3
Permissions in this forum:
You cannot reply to topics in this forum|
|
|

